
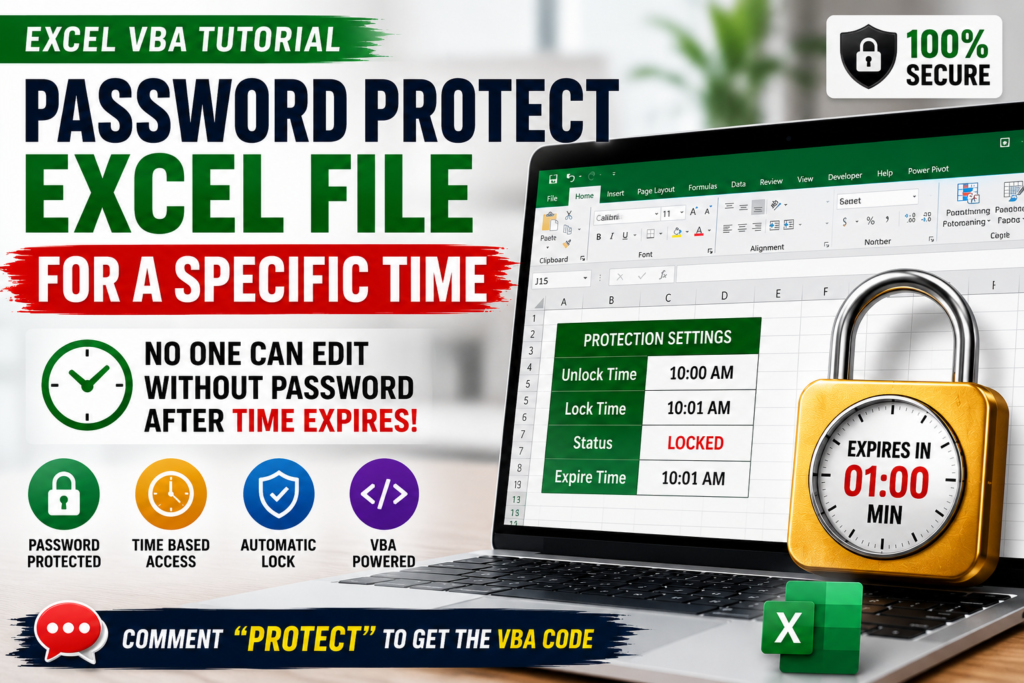

Meta Title: Password Protect Excel Workbook with Expiry Time Using VBA | Complete Tutorial
Meta Description: Learn how to build an Excel VBA solution that allows users to edit a workbook only for a limited time. After the expiry time the workbook automatically locks again. Includes setup, security tips, troubleshooting, FAQs and related tutorials.
Introduction
Excel workbook protection is useful, but many businesses need something smarter than a permanent password.
Imagine sending a quotation that should be editable for only one hour, an audit checklist that should be modified only during an inspection, or a premium template that customers can unlock temporarily. A time-based protection system solves this problem.
In this tutorial you will learn how to build an Excel VBA solution that unlocks a workbook for a limited period and automatically protects it again after the expiry time. The technique is practical, easy to maintain, and suitable for HR, finance, inventory, manufacturing, consultants, trainers and anyone distributing professional Excel templates.
Why Use Time-Limited Workbook Protection
• Prevent accidental editing after a deadline.
• Allow temporary access without permanently sharing the workbook password.
• Maintain an audit trail of who unlocked the workbook and when.
• Improve security for commercial Excel templates and business reports.
• Reduce manual effort because the workbook protects itself automatically.
How the Solution Works
The solution uses a hidden configuration sheet that stores the user name, unlock time, lock time, status and expiry time.
A VBA macro validates the password, records the current user and unlock time, then temporarily removes worksheet protection. Whenever the workbook is opened or the timer expires, VBA checks the expiry time. If the allowed time has passed, the workbook is automatically protected again.
Workbook Structure
Create two worksheets:
1. Main Data Sheet – the sheet users edit.
2. Configuration Sheet – contains User Name, Unlock Time, Lock Time, Status and Expiry Time.
Hide the configuration sheet using Excel’s Very Hidden property so ordinary users cannot unhide it from the Excel interface.
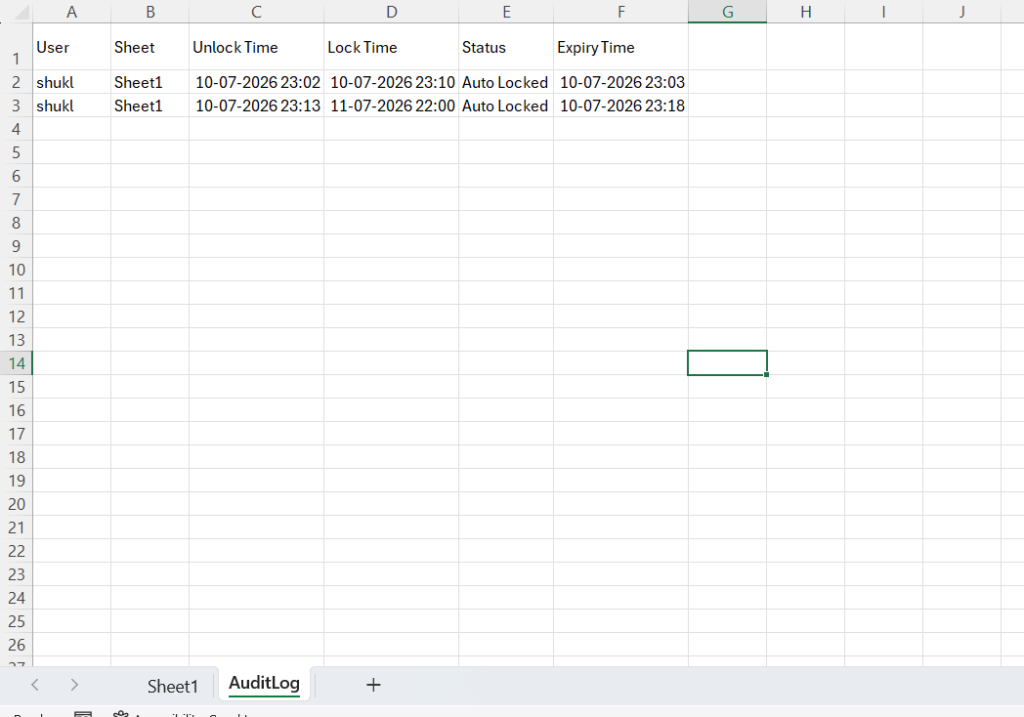
Step 1 – Create the AuditLog Sheet
Add the following columns:
• User Name
• Unlock Time
• Lock Time
• Status
• Expiry Time
These values make it easy to monitor when the workbook was unlocked and when editing rights should expire.
Step 2 – Add the Workbook Events VBA code
Open the Visual Basic Editor from the Developer tab. Add the workbook event procedures inside ThisWorkbook. These procedures verify the protection status whenever the workbook opens or closes and ensure the timer is respected.
Option Explicit

Private Sub Workbook_Open()

    Dim ws As Worksheet
    Dim LogWS As Worksheet
    Dim LastRow As Long
    Dim Expiry As Variant

    Set ws = Worksheets("Sheet1")      '<<< CHANGE SHEET NAME
    Set LogWS = Worksheets("AuditLog")

    LastRow = LogWS.Cells(LogWS.Rows.Count, "A").End(xlUp).Row

    If LastRow < 2 Then
        ws.Protect Password:=SheetPassword, UserInterfaceOnly:=True
        Exit Sub
    End If

    Expiry = LogWS.Cells(LastRow, 6).Value

    If IsDate(Expiry) Then

        If Now >= Expiry Then

            ws.Protect Password:=SheetPassword, UserInterfaceOnly:=True

            LogWS.Cells(LastRow, 4).Value = Now
            LogWS.Cells(LastRow, 5).Value = "Auto Locked"

        Else

            ws.Unprotect Password:=SheetPassword

            NextCheck = Now + TimeValue("00:00:05")
            Application.OnTime NextCheck, "CheckSession"

        End If

    Else

        ws.Protect Password:=SheetPassword, UserInterfaceOnly:=True

    End If

End Sub


Private Sub Workbook_BeforeClose(Cancel As Boolean)

    On Error Resume Next

    Application.OnTime _
        EarliestTime:=NextCheck, _
        Procedure:="CheckSession", _
        Schedule:=False

End Sub
Step 3 – Create the VBA Module
Insert a standard module and paste the main protection code. Store the workbook password in one location so it is easy to change later. Replace every sample worksheet name with the name used in your workbook before testing.
Option Explicit

Public NextCheck As Date

Public Const SheetPassword As String = "1234"

Sub UnlockSheet()

    Dim ws As Worksheet
    Dim LogWS As Worksheet
    Dim NextRow As Long
    Dim pwd As String

    Set ws = Worksheets("Sheet1")          '<<<< CHANGE SHEET NAME
    Set LogWS = Worksheets("AuditLog")

    pwd = InputBox("Enter Password")

    If pwd <> SheetPassword Then
        MsgBox "Incorrect Password!", vbCritical
        Exit Sub
    End If

    ws.Unprotect Password:=SheetPassword

    NextRow = LogWS.Cells(LogWS.Rows.Count, "A").End(xlUp).Row + 1

    With LogWS

        .Cells(NextRow, 1).Value = Environ$("Username")
        .Cells(NextRow, 2).Value = ws.Name
        .Cells(NextRow, 3).Value = Now
        .Cells(NextRow, 4).ClearContents
        .Cells(NextRow, 5).Value = "Unlocked"
        .Cells(NextRow, 6).Value = Now + TimeValue("00:05:00")

    End With

    NextCheck = Now + TimeValue("00:00:05")

    Application.OnTime NextCheck, "CheckSession"

    MsgBox "Sheet unlocked successfully." & vbCrLf & _
           "Editing allowed for 5 minutes.", vbInformation

End Sub


Sub CheckSession()

    Dim ws As Worksheet
    Dim LogWS As Worksheet

    Dim LastRow As Long
    Dim Expiry As Variant

    Set ws = Worksheets("Sheet1")          '<<<< CHANGE SHEET NAME
    Set LogWS = Worksheets("AuditLog")

    LastRow = LogWS.Cells(LogWS.Rows.Count, "A").End(xlUp).Row

    Expiry = LogWS.Cells(LastRow, 6).Value

    If IsDate(Expiry) Then

        If Now >= Expiry Then

            ws.Protect Password:=SheetPassword, UserInterfaceOnly:=True

            LogWS.Cells(LastRow, 4).Value = Now
            LogWS.Cells(LastRow, 5).Value = "Auto Locked"

            MsgBox "5 Minutes Completed." & vbCrLf & _
                   "Sheet has been locked.", vbInformation

        Else

            NextCheck = Now + TimeValue("00:00:05")

            Application.OnTime NextCheck, "CheckSession"

        End If

    End If

End Sub
Step 4 – Create the Unlock Button
Insert a Rounded Rectangle shape, label it ‘Unlock’, and assign the Unlock macro. When users click the button they are prompted for the password. If the password is correct the workbook becomes editable until the expiry time.
Step 5 – Test the Solution
Set the expiry time to one minute for testing. Click the Unlock button, enter the password and edit the workbook. Wait until the timer expires and try editing again. The workbook should automatically reject changes and restore protection.
Secure the Workbook
After confirming everything works correctly, strengthen the solution:
• Set the configuration sheet to Very Hidden.
• Lock the VBA project for viewing from VBAProject Properties.
• Use a strong password.
• Save the workbook as XLSM.
• Share only the protected version with end users.
Common Mistakes
• Macros are disabled.
• Workbook saved as XLSX instead of XLSM.
• Worksheet names in VBA do not match actual sheet names.
• Password changed in one location but not another.
• Incorrect system date or time.
Troubleshooting
If the workbook never locks again, verify that the expiry time is stored as a valid Excel date and time. If the Unlock button does nothing, confirm that the macro is assigned correctly and macros are enabled. If users can still access the configuration sheet, ensure its Visible property is set to xlSheetVeryHidden.
Best Practices
Keep all configurable values together, use descriptive variable names, comment important sections of code, and test the solution with multiple users before distributing it. Remember that VBA protection improves security but should not be treated as enterprise-grade encryption.
Related Tutorials
Excel Dashboard in 60 Seconds: https://us.seoanalyser.in/excel-dashboard-in-60-seconds/
Excel Table of Contents: https://us.seoanalyser.in/table-of-contents/
Excel Sales Dashboard: https://us.seoanalyser.in/excel-sales-dashboard/
Inventory Management System: https://us.seoanalyser.in/inventory-management/
Excel Expense Tracker: https://us.seoanalyser.in/excel-expense-tracker/
PowerPoint VBA Trick: https://us.seoanalyser.in/powerpoint-vba-trick/
Salary Slip Generator in Excel VBA: https://us.seoanalyser.in/salary-slip-generator-excel-vba/
Frequently Asked Questions
Q. Can I change the unlock duration?
A. Yes. Modify the expiry time logic to minutes, hours or days.
Q. Can I use multiple worksheets?
A. Yes. Extend the protect and unprotect routines to all required sheets.
Q. Can I change the password?
A. Yes. Update the password constant in the VBA module.
Q. Will this work in Microsoft 365?
A. Yes, provided macros are enabled.
Conclusion
A time-based workbook protection system is one of the most practical VBA automation techniques for professionals who share Excel files with clients or colleagues. Instead of relying on manual protection, the workbook automatically manages editing permissions based on an expiry time. When combined with a hidden configuration sheet and a locked VBA project, it provides a professional workflow that is simple for authorised users and much harder for others to modify.
If you enjoyed this tutorial, watch the accompanying video and comment ‘Protect’ to receive the complete VBA code and implementation guide.


Pingback: 10 Hidden Excel Features Microsoft Quietly Added This Month (Most Users Haven't Noticed Yet) - Excel AI Tools and SEO Guides
Pingback: SUM Is Great, SUBTOTAL Is Smarter—But This Hidden Excel Function Does Even More - Excel AI Tools and SEO Guides